Monday, July 22, 2019


Wish Flag Collaboration

Hello everyone!  Today I'm sharing another collaboration using StencilGirl® stencils initiated by Tina Walker.  Our flag(s) could be made of anything and be as big or small as we wanted.  Mine is made of muslin, cotton batting and assorted ribbons and fabric.  

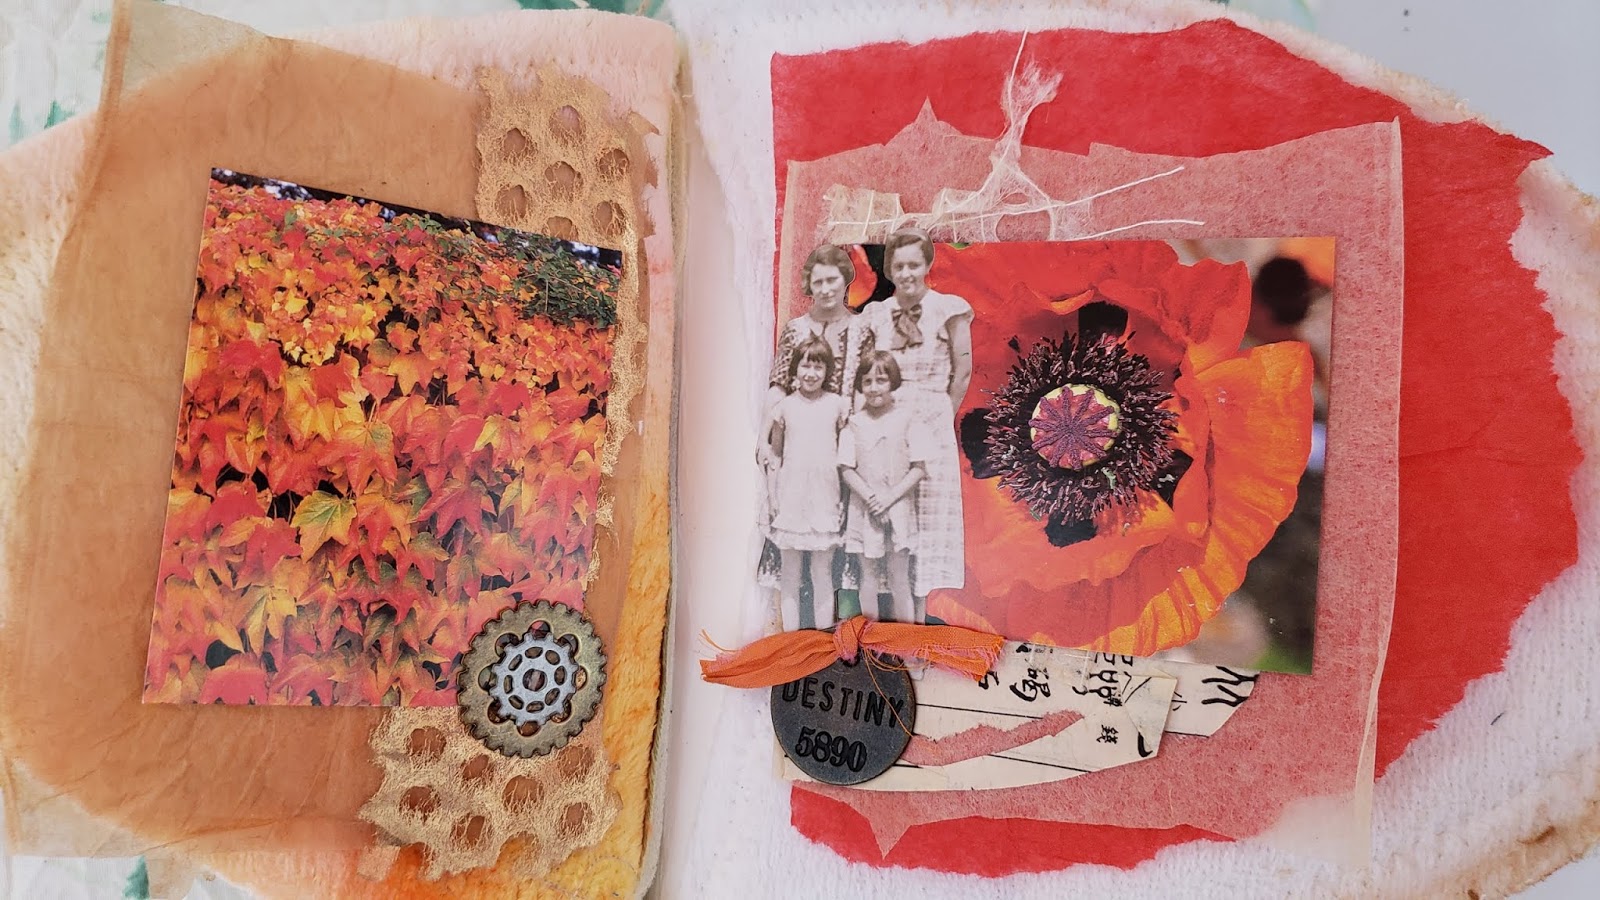
I tore 10, 6x8 pieces of muslin and cut 5 pieces of cotton batting. I applied white gesso through stencil L550 'Thicket Background'. I grabbed a couple of scrap pieces of muslin and a stencil from the February 2018 stencil club.  I sprayed some dye ink through the stencil onto 1 piece of muslin and printed on another piece of muslin with the excess spray from the stencil.

While those were drying, I applied 1 of 5 different acrylic paints through L676 'Longwood Florals stencil', L422 'Herbs stencil', L594 'Thistle' through 5 of the 6x8 pieces of muslin.  I wanted some "edging" so I applied paint through stencils from October 2018 and December 2017 stencil club in the corners.  While the paint was drying, I gathered some scrap ribbons and fabrics to make some "tails" for my flags.  I knew I wanted some sort of quote on the flags so I grabbed some quotes that I had stamped on some muslin quite awhile ago.

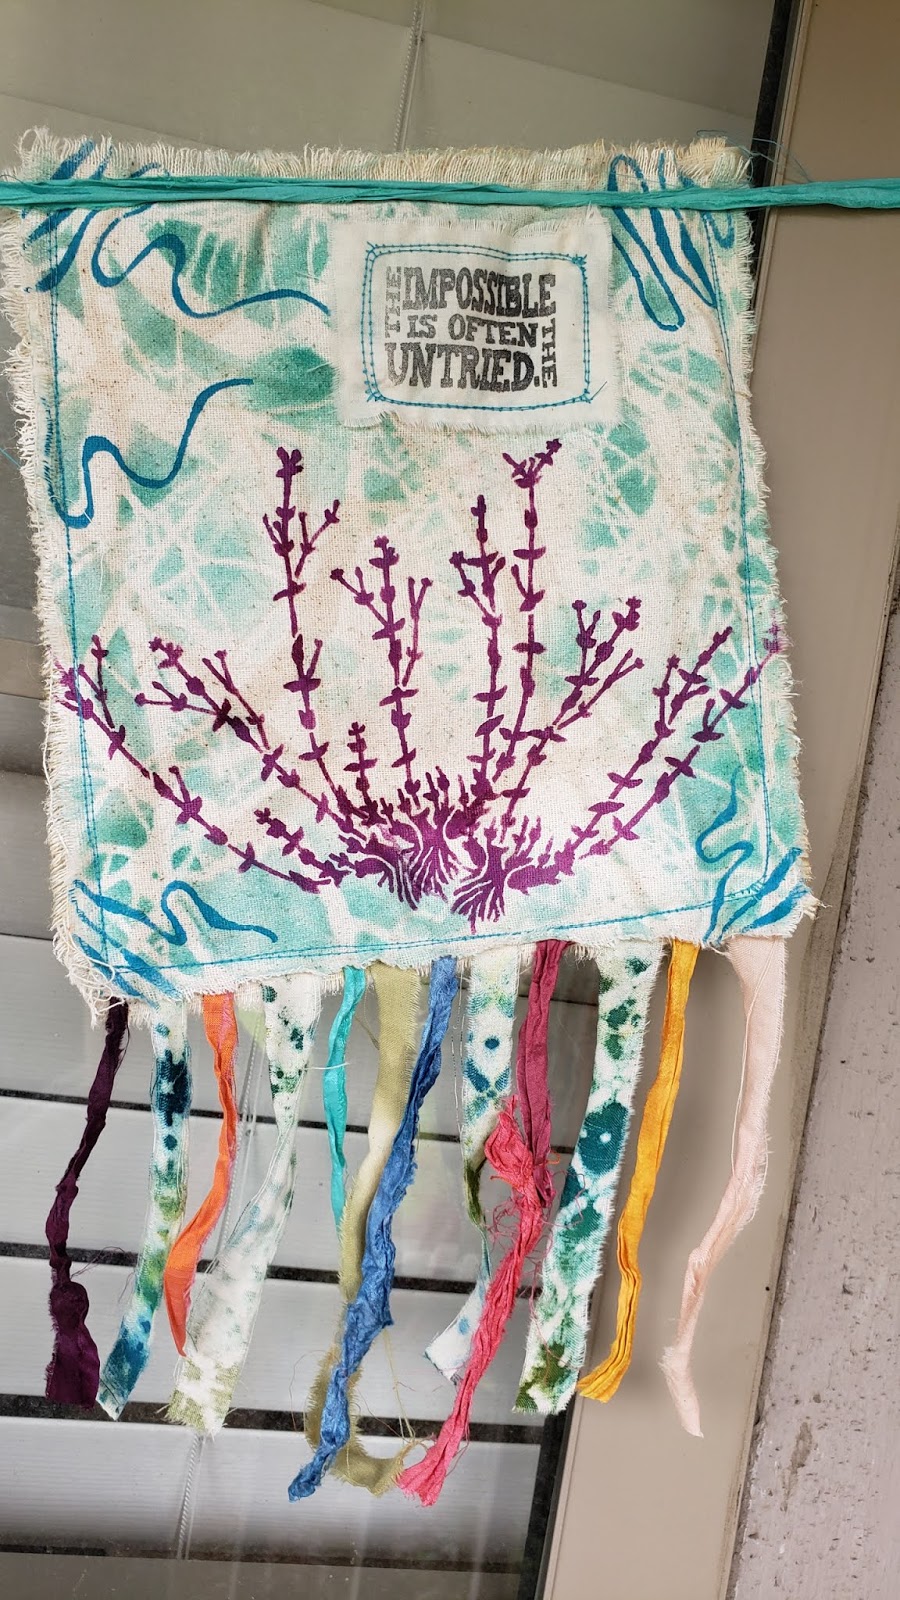
Once everything was dry, I used the same stencil L550 'Thicket Background' and applied pan pastels through the stencil randomly over the white spaces.  Since I wasn't sure if I was going to be hanging this outside, I sprayed all of the flags with a spray fixative so that everything stayed in place.

I sewed on my quotes, then pinned together the muslin with the cotton batting and another piece of muslin. I pinned my tails on the bottom in between the muslin and cotton batting. After everything was pinned up, I sewed around the flags twice with some turquoise thread.

Then I dug through my stash of sari ribbon and found the perfect color of turquoise to hang my flags from.  See below for photos of my beautiful Wish Flags.


Visit the Stencil Girl Blog for Tina Walker's Stencil Girl post:


Monday, May 27, 2019


The Serendipitous Slipper Challenge

Hello my creative friends!  It's been awhile!  Today I am blogging about another collaboration.  I can always count on Tina Walker to gather a group of artsy people for a challenge that really makes you think out of the box.

This collaboration/challenge revolved around those "disposable" slippers you get when you go to the spa (I bought a package of 12).  When thinking of what type of project I wanted to do, I couldn't decide between two, so I made both!  Here is what the slippers looked like before deconstructing them.


My "secondary" project was to make a tote. The tote was constructed of washed raw canvas (duck cloth).  After cutting the slippers apart, I dyed a couple of the fabric parts of the slippers in tumeric with sprinkles of instant coffee. I dyed some smaller shapes in acrylic ink.  After everything was dry, I stenciled on shapes with acrylic paint.  I knew I wanted to incorporate the soles of the slippers, so I dabbed some acrylic paint on them and after they were dry, randomly sanded them to show the pattern on the sole.

I machine sewed all of the fabric pieces onto the tote and hand stitched the sole pieces on, then added more hand stitching all over.  I added a cross body shoulder strap made of cotton roping.


My "main" project was a book made after dyeing the fabric with inks, dyes and sprays and machine sewing pieces back to back. I added scraps of ephemera, fabric, paper and embellishments with photos of flowers and plants.


I hope you enjoyed these projects as much as I enjoyed creating them.  I especially love the book!

Here are some of the other projects people created:


Thursday, February 28, 2019


Coffee Filter Collaboration

When the chance for a collaboration came about using coffee filters and tea bags, I jumped at it!
Naturally I could have used the raw color of the coffee and tea (which I may still do at a later date), I chose to color them all kinds of bright colors because I knew I wanted to use Encaustic Medium and Amazing Clear Cast Resin in my project.

I love the look of encaustic and resin together.  You get a different kind of depth with each medium, one has a dreamy look and one has the look of a clear blue ocean.

Here is an image of my final piece and some close-ups.


See below for projects from others in the collaboration:


Hope you enjoyed my project!  Thanks for stopping by!