Home Décor Pillow
Hello everyone. My post today is based on inspiration from a
pillow I bought from a local Vintage Market.
It looked like it would be pretty easy to make and I already had all of
the components.
I started by washing
and drying some raw canvas (also known as duck cloth) 3 times to make it
softer. While they were washing, I dug
through all of my fabrics, especially my eco-dyed ones. I wanted more neutral tones with a couple of
pops of color. I started to cut some
small pieces out. I knew I wanted the
word “Family” on the pillow, so I gathered a piece of muslin and stamped the
word with brown staz-on ink. After the
canvas was washed, I cut 2-18x18 squares and laid out the fabrics, overlapping
in a cohesive manner. Once I got them
laid out the way I liked, I pinned them down and sewed around each piece with
ivory colored thread.
The one I bought had
a store made insert inside that could be taken out so that the cover could be
washed. I figured I would make my insert
from muslin and fiber fill. I cut out
2-17x17 squares of muslin, pinned them together and sewed around the square
leaving about ½” edge. Make sure you
leave an opening big enough to fit your hand through. Once you are done sewing around the square,
flip it inside out so that you get a clean edge. Stuff the muslin pillow with small hand-fulls
of poly-fill. Once you get the pillow to
the firmness you like, hand sew the opening shut.
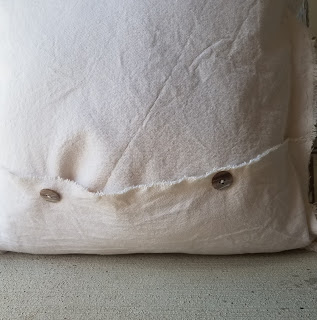
In order to be able
to take the insert out, you have to create an opening in the back. I took the back piece of canvas and cut-off
the bottom 3 inches (yes, I could have made this piece initially 18x15 but didn’t
think of it until this step J). I then cut a piece 18x6 to be my “flap”.
I wanted my finished
pillow to have the “fringe”, so I laid the cover right-side out and put the 2
back pieces on the back of the cover with the smaller piece over-lapping the
bigger piece. Pin together and sew
around the outside square.
Once you are done
sewing the canvas cover, pick up your muslin insert and begin to stuff it into
the canvas cover.
So that the back
stays together and looks decorative, I added 2 buttons.
And there you have a
beautiful pillow that you can either use it as a decoration or lay it on your
couch. Here are some close-up images of
my final product.


Well done. Thank you for inspiration and guidance!
ReplyDelete